Showing posts with label skirt. Show all posts

Thursday, 30 June 2016

Stashbusting linen project (pt.1)

When I dug out my Salme #113 playsuit pattern, I also found that I had bought another Salme pattern.
A rather nice top with a peplum and key hole cutouts front and back. I remember reading somewhere that peplums are flattering to the slightly uncurvy figure (of which I have plenty), and I suspect that's why I bought it in the first place.


I've made kind of a silent pledge to use patterns, and when possible, fabrics that are already in my stash. Just to keep costs down, and also keep the hoard down (and make room for new fabric, of course). I am happy to report that nothing new was purchased for this project, and it all started with the top.

I initially meant for this to be just a muslin of the Salme peplum top. I found two pieces of light blue linen in my stash that I bought out of a remnant bin. The weave is quite loose, and the fabric is a medium weight, but very soft. I really liked the colour, so if all turned out well, I could see myself wearing it. In some happy twist of events, I also found a piece of silvery grey acetate lining, and a plan started forming in my mind.

The top sewed up great. The instructions were very good, much better than for the playsuit luckily. But it was hard to check the top for fit during construction.  You need to sew the lining to the bodice early in the process, and you won't be able to really try it on until the zipper is in. And for that to happen, you need to attach the peplum piece too, as the zipper is in the side seam, and halfway down the peplum.
The top was a good fit over the shoulders and bust, but baggy below the bust. So, I had to take it apart again to make adjustments. The main issues were the bust darts (and the bodice length). I had fabric pooling on each side under the bust. I noticed that the dart needed to be taken in in the lower half only, so the excess would be taken up in the dart. It did wonders for the bagginess. I also took in a little bit more in the back darts, to tighten it up a bit.

This is the top before adjusting (sorry, bad phone pics)
On the front sides you can see that extra fabric pooling from the bust, and actually folding at the side seam.
In the back, the bodice is too long, causing wrinkles.


The fabric caused a bit of a problem, because it "grows" when handled and ironed too much. I made some wide legged trousers out of the same quality, and that has now got "knee-bags" in it. And a saggy butt. The top really needs lining, but during all the adjusting and unpicking, it had no support and it was hard not to stretch it. It would have benefited to be underlined, but I didn't want it to be too heavy. It was alright, as long as it was handled with care. (Top tip (and note to self!); when dealing with fabric that wants to warp and stretch, it helps to press, not iron.)

I noticed that with a peplum it is very important that the waist seam sits exactly at the natural waist, or the bodice will bunch up if it is too long. I attached my peplum twice before I found the sweet spot, and I also learnt that I'm rather short waisted! Fitting clothing is quite enlightening, and I think it is very interesting to see the huge differences small adjustments make.

Now, there is one thing I didn't like about the pattern, the peplum piece is not lined. This peplum is basically a very short full circle skirt, and we all know what it's like to hem a full circle. If the pieces were lined, you would have a clean finish on the (whole) inside, plus have the hemming sorted in one swoop. I didn't have enough lining fabric anyway, but If I make this top again the peplum will be lined.


I hemmed the peplum with bias binding,
and did the same for the skirt.


The cutout in the bodice is supposed to be closed by a stitch in the corner.
But I like it open, because you can flip down the tips, and have a collar of sorts.
We'll see what I end up doing


A little press and some minor finishing left!


When the top was all done, I still had a decent  piece of linen left. Was it enough for a skirt? Why, yes it was! The thought of a whole linen outfit was tantalising!

The pattern is part of  McCalls #7608 from the 1960s, a suit with a blouse. I decided to use the straight skirt, as it matched my waist size, so hopefully not too much redrafting. It also features a kick pleat in the back. (I also MUST make the jacket from this pattern, it looks great!)

Sadly, there was not enough of the silvery lining left, but I knew the skirt absolutely had to have support, so I went with underlining. You basically cut your skirt pieces in fashion fabric and another lining fabric, baste the edges together and treat them as one piece for the rest of the construction. The seam allowances need to be finished with this technique, and I went for binding them with bias strips of leftover acetate lining. The underlining is very fine cotton batiste, densely woven and ultra light.


When I stitched it up and tried it on it was very frumpy. Comfortable, yes, but oh so frumpy! I shaved off about one inch on both hips, and lightly pegged the skirt, so that it tapers in towards the hem. In all, I narrowed it 8" on the total width, so quite a lot!

There's only some handstitching to do on the skirt hem, and top lining. I also need to attach a hook and eye closure for the skirt and finish the zipper end. But other than that, I am just waiting for the sun to shine, so I can get pictures for the "big reveal"!



Saturday, 28 March 2015

New shirt and the closet-shrinking skirt!

Hey all!

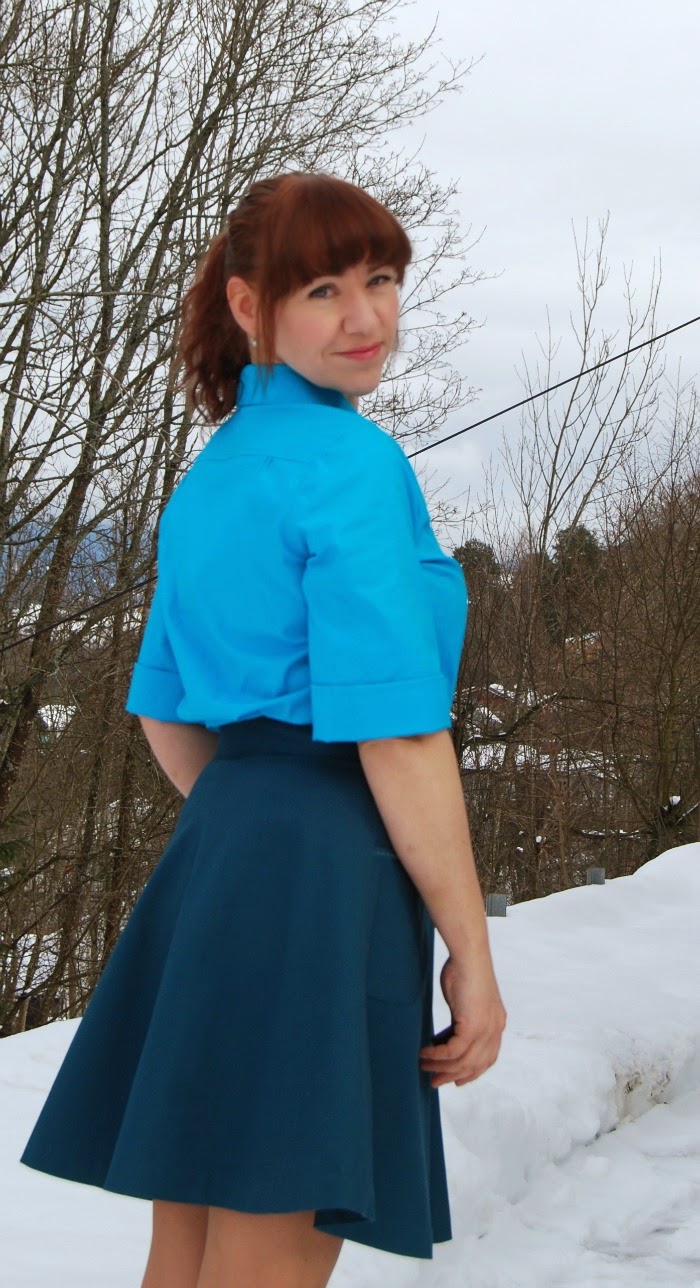
So I finally got to photograph my petrol skirt I made a few weeks ago. We got a surprice snowfall the day before yesterday, which gracefully covered all the mud in our backyard. And that spells great lighting!


Since I finally found the shirt pattern of Win (Simplicity #2195), I wipped up another one last weekend, to wear with the skirt. I used the same fabric for this version as I did the first one. It's just some really cheap cotton canvas, which is great to work with and suits everyday clothing. The big plus for me is that it comes in so many lovely vibrant colors, and has no right and wrong side. Again, I picked one of "my recommended colors".


Sorry for the blurry photo.
I need a manned camera!


I love this new shirt, it turned out even better than the first, and now I don't have to dread making buttonholes anymore. Bertha is a champ with her automatic buttonhole function, and they come out perfect every time! Yay!


The skirt however, has fallen from grace. It seems to have shrunk in my closet. I could barely eek it on over the shirt! I haven't been running much the last few weeks, due to a ankle sprain that won't quite heal. It could be that I need a kick in the backside, so the darn skirt will fit again. I'm sure it will work out eventually.


On another note, I am in full swing with my Ceylon dress. The pattern is traced and cut, now on to the muslin! Oh, and EASTER BREAK IS HERE!!!!! Yeehaw!


Monday, 9 March 2015

That 70's skirt revisited! (Simplicity#5918)

Hello all!

What a weekend it's been!
I finally had time to sit down with my new (to me) sewing machine, and have a go at sewing again.
Let me tell you, it was great, but I disovered I was a bit rusty, and needed an easy project to begin with. So out came the skirt pattern I used for my 70's linen skirt. It's the Simplicity #5918. To date, that skirt has become my most worn item of all I've made, so another one would be a total win!


I pressed it. Honest.


I rummaged through my stash and declared I had nothing that was skirt appropriate, so there was a bit of shopping, too (win#2)! I got some cotton twill in a nice petrol blue that will go nicely with the Victory jumper I am currently knitting. After deciding I wanted to upgrade the first version a bit, I found some green acetate lining in my stash and made an effort to do it "properly". I even did french seams on the lining....oh la la.


Pretty innards :)


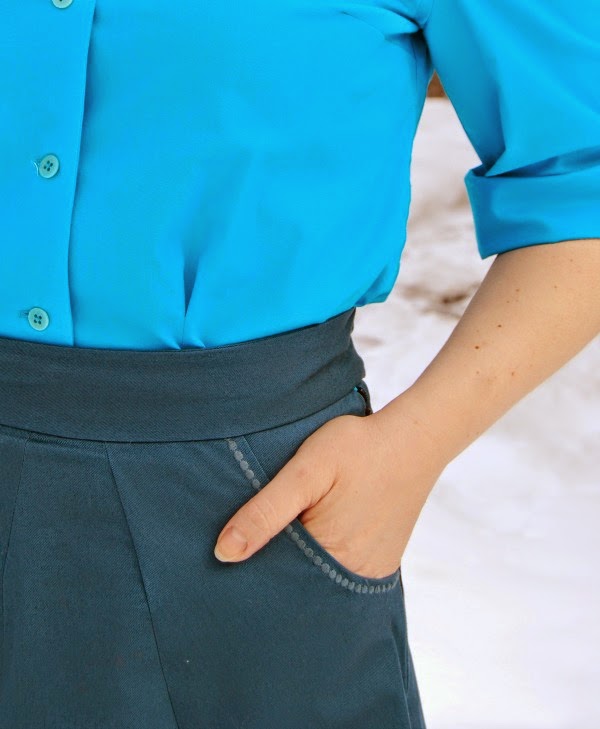
I also added pockets to this second version, because it is a rather plain skirt. I drafted them myself, and used one of Bertha's decorative stitches for embellishment on the opening edge. (What? Why, of course a gave my machine a name!) I didn't want top stitching on the pockets, and sewed them on from the inside. Which was a total b*tch on that curve, but I got the look I was after. Besides, challenges are good, however small :)


Small details  makes a big difference!


The hemming is always the worst part for me. I spent an entire day on this.... The hem on the first version looks rather aweful, the linen was so thick and I made them hem too deep for it to lay nicely. So I was determined to have this one look better. I wanted an invisible hem, and to make it extra fancy, I made bias tape out of lining material to cover the raw edge, and thus kept down the bulk. The hem was then hand sewn. Killed my back, but oh so worth it.

At this point, the thought of hemming that slippery lining too, struck the big fear in me and I got a bit creative. I just folded the edge once, and used the decor stitch again just on top of the raw edge and got a cool and easy hem that way. It looks great on both sides, so that goes into my success account! If anything, I am a bit annoyed that the lining ended up a little short, but I can live with that.


I know it's pathetic, but those pockets makes me proud!


I really like that bias bound hem.


All in all, I am very happy I made some extra effort with this skirt, as it turned out rather nice. I am also very happy with my machine. She sews like a dream!
Now, I just need to get a hook and bar to put in that waistband, and it's ready to wear. I know hanger-photos are kind of unenchanting, but I just had to share my excitement!

Did you make anything exciting this weekend? Do tell!


Sunday, 8 June 2014

That 70s skirt (Simplicity # 5918)

Hi all!

So , it's been a while!
Well, after the Sew for Victory sewalong I found myself needing a bit of a break.
Nothing serious, just life in general.
I decided to leave the sewing alone, until I had an urge to sew again, and this weekend the urge surfaced.

So, I made a skirt!
Although unblogged, I have attempted some skirt sewing earlier, but never really had any good results. I lost interest and left it. But with summer drawing close, the skirt shaped hole in my wardrobe became to much to ignore. I love the look of cute skirts in summer and they are so easy to wear, but I have struggled finding my style. I love the look of pencil skirts, but I have found that they are difficult to sew and make look good on my boardlike figure.

This winter I came across some sewing patterns in my local thrift store (which never happens!), so I bought them all! Among these was this cute 70s pattern for pants, skirt and jacket.


The skirt would be a perfect quick project, and I had both fabric and notions in my stash. Win win!
The fabric is a medium to heavy weight linen, that was originally destined for a dress. It was gifted to me by my mom years ago :) Thanks, Mummy!
I came to the conclusion that is was too heavy for a dress (and insanely wrinkly!), so a casual skirt would be better.


Bad hairday hat.
 My most prized posession...


The construction was straight forward, and basically a breeze right up to the hemming. I'll be the first to admit that the hemming on this thing is not my brightest of sewing moments, but it was dang hard! The linen was stiff and hard to wrangle, but it works. Kind of.
I also think an invisible zipper would look better, but I am fine with this one. It came off some pants that was given to me, so totally free of charge. Recycling is rewarding!


It is hard to see from the photo, but I got to try the overlock-stitch on my machine too! I can't believe I have never tried it before, it worked great on this fray-happy fabric! I read about the stitch setting on some excellent blog some time back, and was baffled to find that my cheap little machine had it :) I love you, little Singer!


 It is good to be sewing again, and this instant satisfaction was just what I needed. Besides, I think this pattern will be great in other versions too. Finally, a tried and true favourite!
Have you done any quick 'n easy summer sewing?


Sunday, 2 February 2014

Box pleats and corduroy

Hello all!

I have been dabbling with skirt sewing this january. I have also been sick and we have gotten INSANE amounts of snow lately, so there has not been much actual sewing time between all the sniffeling and shovelling.

But there has been results; a navy corduroy version of Simplicity 4824 from 1943.


Pattern envelope

I went for view 2, with pleats both in front and back.


Honestly, the buttons are straight, the hanger inside just distorts the whole thing ;)


I've always loved the look of pleated skirts, and decided to try one. The actual pleating was very simple, and also makes it easy to make adjustment on size if needed. I had some navy/dark petrol corduroy in my stash that was intended for some  40s swing pants, but with all the procrastinating this plan produced, I decided to just use the fabric for something else (also, this makes for more fabric shopping in future *win*).
It is perhaps a bit too heavy for a skirt with big box pleats, it got a bit bulky in places, but it works. I want to try this pattern with a lighter fabric sometime, just to see the difference.


The skirt is just 5 pieces, and has a side button placket. I used large chunky, pearlized plastic buttons, but kept them in the same colorway. I think it would look great with some contrasting ones, too! The skirt has top stitching, but it disappears in the nap, so I didn't use any contrasting there either. But these features are great for adding interest to the design, so I believe this pattern has lots of potential in a variety of versions.


I blind hemmed it by hand and added some contrast bias binding to the edge. I think it adds a little touch to the finish, which is otherwise just pinked seams and nothing fancy :)


As usual I find photography indoors to be quite difficult. My camera (still) has a broken flash, and I had to rig up some lamps that are intended for construction sites and I see it makes yellowish highlights appear. Sorry for that, I hope to improve...

All in all, I like the skirt. For my next version, I will use a lighter fabric, I will also shorten the stitching down the pleats. I think they should be more open (higher up) if that makes sense. I think it should have more width also (to make it even more A-line), but perhaps more open pleats will take care of that. If not, it should be possible to add on some to the pattern pieces.

I am also thinking it could be fun to sew up a matching cropped jacket to go with it?
What do you think?